
Level Up Your Art Business' Brand Photos

Day in and day out potential collectors are out there looking for the perfect piece of art to welcome into their space.
And every day, you’re creating high-quality artwork and putting it out into the world.
If only the two of you could connect!
I absolutely get the struggle, friend!
If your photos aren’t stopping their scroll and compelling them to visit your shop, you’re missing out on putting your art in the hands of the people it’s perfect for.
Now, let me make it clear that there’s more to selling artwork than just pretty pictures. But in today’s post, we’re going to focus on your art business’ brand photography, because you’ll make a bigger impact when your photos:
elevate your work,
tell your story in a way that’s relevant to your audience,
and communicate trust and value.
Stick around and by the end of this post I promise I’ll have your mind churning with ideas of how to
Level up your business’ brand photography.
(While saving your pennies to work with that amazing photographer you’ve been dreaming of hiring.)
2019 was a breakthrough year for me. I hit a stride with my business, served 13 amazing clients, hit my 1st, 2nd, and 3rd financial goals, and lived my mission of helping artists make a living from their gifts.
The funny thing is that the majority of my income started flowing in the second half of the year. It was 6 months of explosive growth that I’m intending on continuing this year. I can’t attribute the success to one single thing— I did a combination of things to help me get to that point- coaching, marketing, learning, etc.
All of these things together created the magic that truly unlocked my potential and gave me a little taste of what’s possible when you get over your own fears and just do the damn thing.
Buuuuut….
I could’ve never been able to have the results I had without my business looking the part of what I wanted it to become.
I wanted to attract artists with a growth mindset.
Artists who are committed to their gifts and their dreams.
The service that I give my clients is exquisite.
I create an environment of growth where it’s safe to dream those big dreams because I help them see how attainable making them come true is.
The work we do together is self-care, it’s high-end, and it’s worth more than just a brand and a website…
But simply writing “5-star concierge-level service” on a website will only go so far.
So I started thinking...
How could I communicate that I was the right person to potential clients without overburdening my site with copy? The answer?
Show. Don’t tell.
So I decided to build a library of images that told the story of my business. At the time I didn’t have the cash to go pro so I learned how to do it myself.
And boy did I ever!!
Today I want to share the process with you, as well as some of the photos from my 2019 DIY-ed brand shoot…
So you can also have a bank of on-brand photos at the ready for your website, Instagram, emails, mail inserts, etc!

Worthwhile Paper, Kara Valentino Ffield, Anusree Sattaluri, Ritual Morning Studio.
Can’t Start Without a Strategy
First thing’s first. You must get crystal clear on who your customer is and what your brand stands for.
You cannot get results without an intimate understanding of how your business is perceived by your ideal customers and how your work or services fit into their lives.
Story (Board) Time
To help create boundaries for your shoot it’s important to land on what story you’ll be telling through your photos. Should you be telling your story? Or that of your ideal customer? The answer is…
It depends.
If you’re shooting artwork, shooting your story and process is totally fine.
However, if you’re shooting a product people can use, then telling the story from the end-user's perspective might be better.
Write a list of the scenes that can help tell that story. Some examples:
A day in the life in your studio.
Your favorite tools.
Working with the inspiration for a commission you’re working on.
Your Christmas ornaments being hung on the tree.
If there are objects that are associated with YOUR brand, for example, you find yourself talking about cocktails, your pets, or travel, or macarons, show it! Don’t go overboard and let that derail your vision, though.
If you’d like a comprehensive list photography shot list, don’t leave without checking out The Website Photography Shot List for Artists.

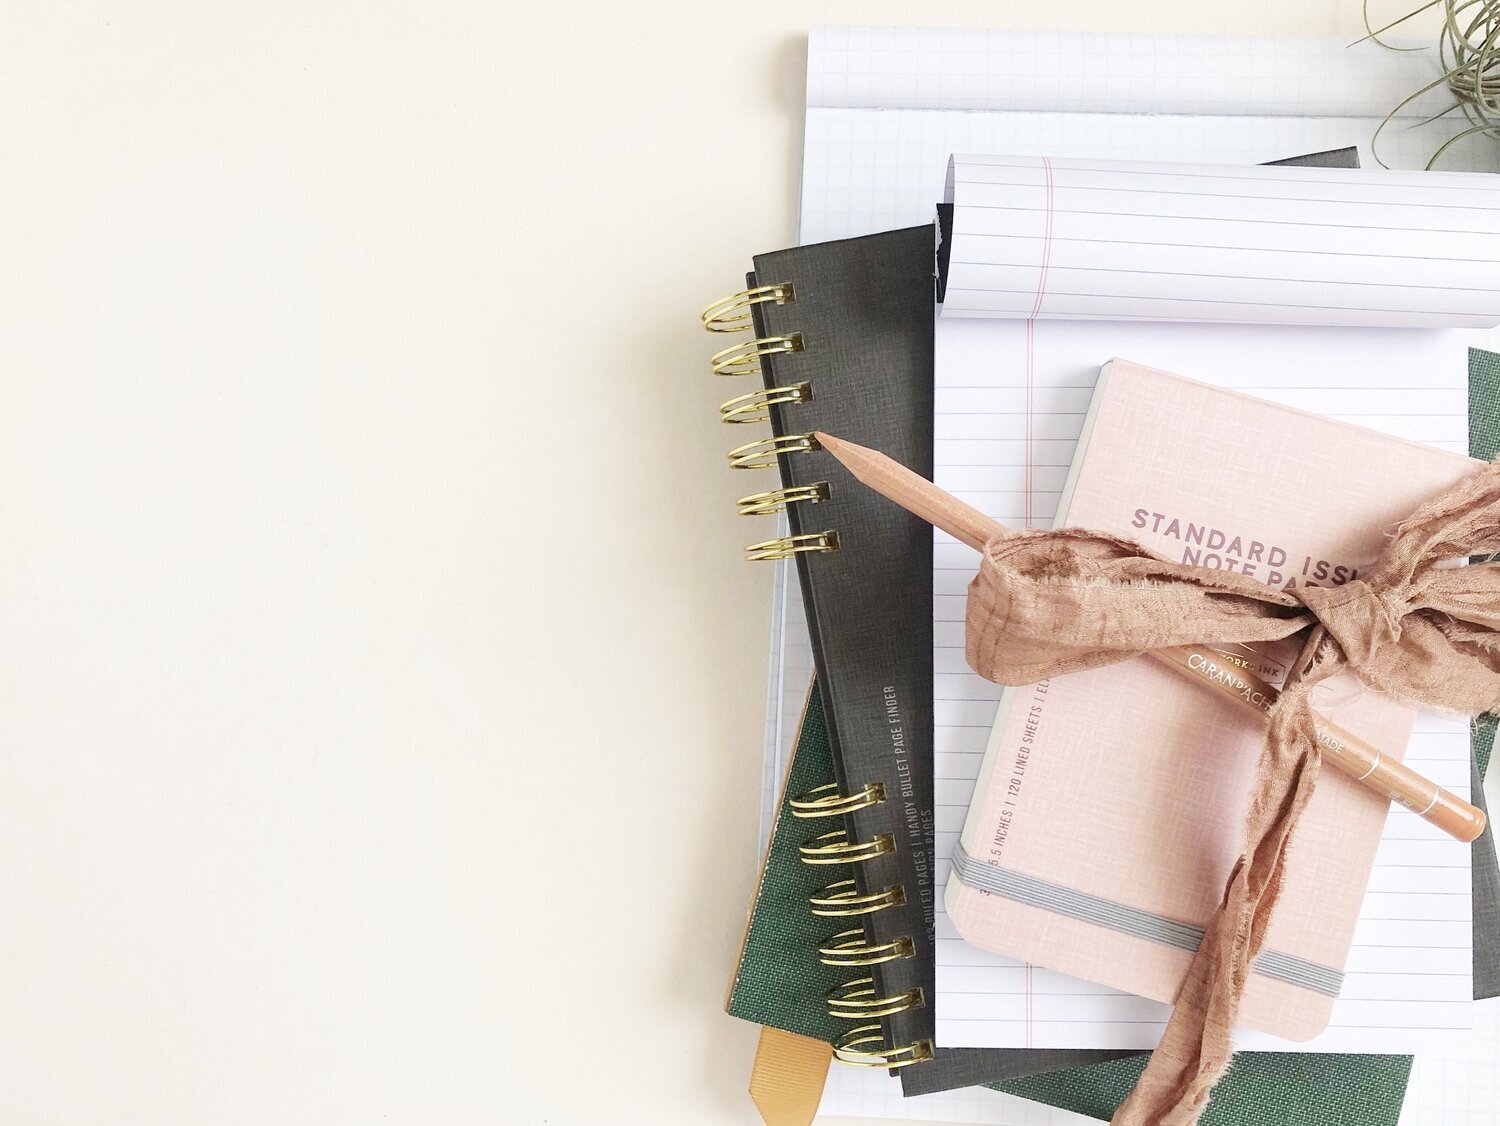
For my DIY brand shoot, I wanted to show a peek inside my process.
Get Organized
Decide where your photos are going to be used. Will you need horizontal banners for your website? Vertical shots or squares? Do you need photos that need negative space for copy?
Make a shot list for your shoot day. Write down the description of the photos, props you’ll use, and the layout of the photos (vertical, horizontal, square).
Pin It to Win It
Start pinning images of props, inspirational photos that can help you tell your story, etc. Try to stick to a color palette for a shot. Is your story energetic and lively? Light and airy? Moody? Earthy? Keep the vibe and colors of your story and brand in mind when pinning.
Organize your Pinterest board by story/scene. Pin the images you’re hoping to shoot along with the props you’ll need to have for the shot.
Props to Props
After assembling your mood board, it’s time to round up the props. Stick with objects that align with the stories you want to tell, your brand, and your ideal customer. And set a budget!

Check out Etsy and don’t discount shops overseas for unique props.
Don’t buy something just because you like it, make sure it supports your story and is “on-brand.”
Get a variety of sizes and textures, organic and inorganic.
Prepare your artwork or products for your shoot as well.
Get resourceful! Borrow, buy used, and check resale shops!
Background Check
You’ll need to think about the background, especially if you’ll be doing flat lays. These are some options:
Natural wood
Cement
Plain colorful backdrop (Check out Color-aid)
Watercolor paper washed with paint
Faux backdrop

I used a masonite board and a quart of paint in 2 colors (one on each side) so I could have options.
Light It Up
Decide what kind of lighting will be best for your shots. Natural, bright light? Dramatic light and dark shadows? If you decide to use natural light, you may need to take your photos across 2 or more days within the same 2-3 hour window (for light consistency).
I shot my photos right by a window with a sheer curtain to diffuse the light. And I also used a white poster board to help reflect light and fill in some shadows.

Schedule It
Depending on how many scenes you’re planning and your lighting decisions, you’ll need to schedule 1 or more days for your shoot. If you have a good friend who can help you, that would also be helpful and make the work feel lighter. Book a babysitter so that you can focus. Plan what you’ll do with your pets so that they don’t accidentally get in the way.
Camera or Phone?
It depends! If you’re handy with a good camera and know your way around focal length and aperture, go for it!
But if you’re like me and can’t remember anything you learned in photography class in college, use a good phone camera. I used my iPhone 8 and it worked very well for my shots. Take a few test shots and make sure that the image size is decent. Anywhere between 2,500 - 1,500px will work well if you’re using Squarespace and want them for your website.
Miscellaneous
You’ll need to be mindful of shadows, to fill them in, you’ll need to position some sort of reflector to bounce the light off of. I’ve used a stiff poster board which I prop up using a couple of clips. If you have a friend, then your friend can hold the reflector board.
Having a tripod will help keep your shots aligned.
Finding a Lightroom preset you like can make editing photos a breeze. Helpful for those of us who aren’t Photoshop pros. I like these Lightroom presets by Light and Airy Photog. You can use Lightroom for free on your phone!
Need that human element? If you need hands in one of your shots or if you want to be in your shots, ask your friend to be the model or photographer.
If you’ll be in some of the shots, decide on your outfit, accessories, hair, and makeup. And do your nails for those close up shots! Permission to schedule a mani granted!
Setting the Stage
Clean and organize the area you’ll be working on prior to staging it.
Set up a table with all the props so that you can easily see everything.
Take a detailed look at your shot list before your shoot. Note any changes that need to be made.
Make sure snacks and beverages are handy.
If you’re like me, a good playlist will do wonders for mood and morale.
Editing
How you edit the photos totally depends on the look and vibe you’re going for.
I like putting them all through one of the Light and Airy Lightroom presets I love for consistency. I’m not Photoshop-literate so there's not a ton I can do in the editing department, so the Lightroom presets were perfect for me! And the best part was that I could do it all from my phone!
Pro web designer tip: If you’re using your photos for a website, make sure you save them to the right resolution and size for your platform.
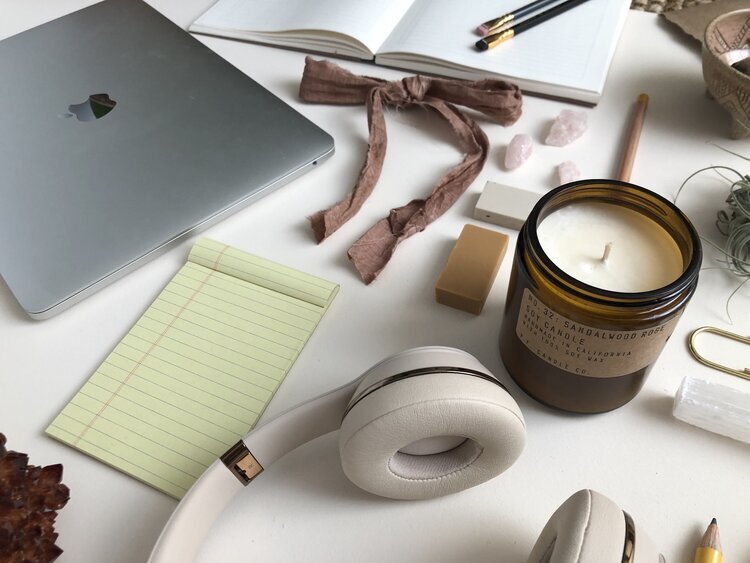
Before editing.
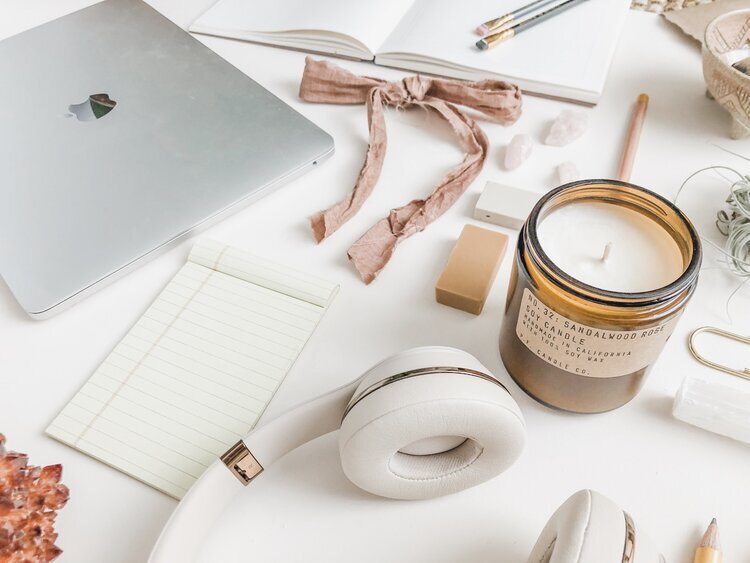
After editing.
Now What?
By the end of the photoshoot, you’ll have a hefty library of on-brand images you can pull out as needed. These photos will allow you to show up consistently and professionally in front of your audience, which can mean a higher perceived value and more sales.
You can repeat the process every time your business needs a little freshening up or if you have a new collection release with a different theme (hello, holidays!).
